
Before we begin, here is some general terminology that is important for understanding this article.
| Term | Meaning |
|---|---|
| Carrier | A carrier (telecom company, mobile network operator (MNO), aggregator etc) who offers routes to/from the Public Switched Telephone Network (PSTN). E.g. AT&T, Verizon |
| BYOC User | An individual or organization who has a business relationship with a carrier. BYOC stands for Bring Your Own Carrier. |
This documentation is intended for both Carriers and BYOC users as defined above.
Somleng is an Open Source, white-labeled, Cloud Communications Platform as a Service (CPaaS), featuring programmable voice and SMS.
There are two kinds of use-cases depending on whether you're a Carrier or BYOC user.
We recommend you try out Somleng by signing up for a carrier account here . If you're looking to install Somleng on your local machine read the Getting Started Guide . Note that this requires some technical knowledge.
Once you have a carrier account you can begin configuring your account to handle programmable voice and SMS.
The dashboard can be used to manually provision carrier resources. Use the Carrier API to automate the provisioning of carrier resources.
You must sign into the dashboard via your subdomain to use Somleng.
The sign in URL is https://your-subdomain.app.somleng.org/users/sign_in.
If you have setup a custom domain all users may access
the dashboard through your custom domain instead.
All users are required to setup two factor authentication (2FA) the first time they sign in. We recommend Authy , Google Authenticator or your password manager to setup 2FA.
Here you will find various settings for your carrier. Under General, you'll see your company's name, subdomain, website, country and logo. Under Developer, you'll see your Carrier API Key, as well as your webhook URL and signing secret for verifying webhooks . If you've setup a custom domain this will appear under the Custom Domain section.
To update your carrier settings:
A word of warning. If you update your sudomain
Accounts are used by carriers, carrier customers and BYOC users to send/receive calls and SMS via Somleng's implementation of Twilio's REST API.
Typically a carrier would create an account for each of their customers. BYOC users might create an account for each project or just create one account for their usage.
There are two types of accounts. Carrier managed and customer managed.
Carrier managed accounts are managed by carriers. These types of accounts can be used by carriers themselves, or by the carrier's individual customers. Carrier managed accounts do not allow customer access. The Account SID and Auth token, which are required to access the Twilio REST API, are accessible by the carrier only and are displayed on the Account's page.
Customer managed accounts are managed by carrier customers directly. These types of accounts can be created via the dashboard by specifying an account owner when creating the account. After providing the account owner's name and email address, the owner will be invited to the dashboard and can manage their account by themselves. The customer will have access to their Account SID and Auth Token and this info will no longer be displayed on the Account's page. The carrier can still disable and enable individual customer accounts from the Dashboard.
To create an account via the Dashboard:
Inbound SIP Trunks are used to configure inbound dialing to Somleng (aka Direct Inbound Dialing). When you create an Inbound SIP Trunk you specify the source IP address from which SIP invite is sent from. Somleng uses this information to determine the carrier, account and how to handle the call.
Once you have setup your inbound SIP trunk, you can then send SIP to any of the following endpoints. We recommend that you use sip.somleng.org for high-availability.
| Endpoint |
|---|
| sip.somleng.org |
| 52.74.4.205 |
| 18.136.239.28 |
| 3.0.30.251 |
To create an inbound SIP trunk via the Dashboard:
Outbound SIP Trunks are used to configure outbound dialing from Somleng. When you create an Outbound SIP Trunk you specify the destination host to send outbound calls. You can specify your host as either a fully qualified domain name (FQDN) or IP address. The outbound SIP trunk configuration determines the dial string that will be used to send calls to your SIP server.
SIP and RTP from Somleng sent through a NAT Gateway from the IP address below. You should allow this IP address on your firewall. You may also need to setup Symmetric Latching on your device.
| NAT IP |
|---|
| 13.250.230.15 |
To create an outbound SIP trunk via the Dashboard:
Phone Numbers represent direct inbound dialing (DID) numbers. A phone number can be either an E.164 formatted phone number or a short code. When you create a phone number you can optionally assign it to an account.
Once provisioned and assigned to an account, phone numbers can be configured with a Voice URL which returns TwiML for controlling the call. This can either be done by the carrier or by the account owner (for customer managed accounts).
To create a phone number via the Dashboard:
Once the phone number has been created you can configure it. To configure a phone number via the Dashboard:
In order to bulk import phone numbers, you can upload a CSV file from the Dashboard.
| Column Header | Content | Possible Values | Example |
|---|---|---|---|
| Number | The phone number or short code | E.164 formatted number or short code. e.g. 85512345678 or 1234 | 1234 |
| Enabled | Whether to enable or disable the phone number | true or false defaults to true |
true |
Number,Enabled
1234,false
85512345678,true
Carrier owners can invite their colleagues to the dashboard.
To invite a user to the Dashboard:
The user will receive an email inviting them to the dashboard. Users with the owner role can manage other users, update their role and reset their 2FA.
Setting up a custom domain allows you to fully white-label Somleng and brand it for your company. This includes the branded dashboard, API, emails and account API documentation.
When you setup a custom domain you need to setup proxy between your domain and Somleng in order for SSL termination to work correctly. Below we describe two methods for doing this via AWS Cloudfront or Nginx. We recommend using AWS Cloudfront unless your have specific custom requirements or you cannot use AWS.
Follow the steps below to configure your custom domain:
Skip this step if you prefer to use Nginx instead.
In order to make this step easier, we've created a Terraform module automates the configuration and management of your AWS Cloudfront distributions via Terraform .
In order to use the terraform module you need to setup and install Terraform first. We recommend following the Terraform AWS tutorial to get started.
# somleng_proxy.tf
module "somleng_proxy_dashboard" {
source = "github.com/somleng/terraform-aws-cloudfront-reverse-proxy"
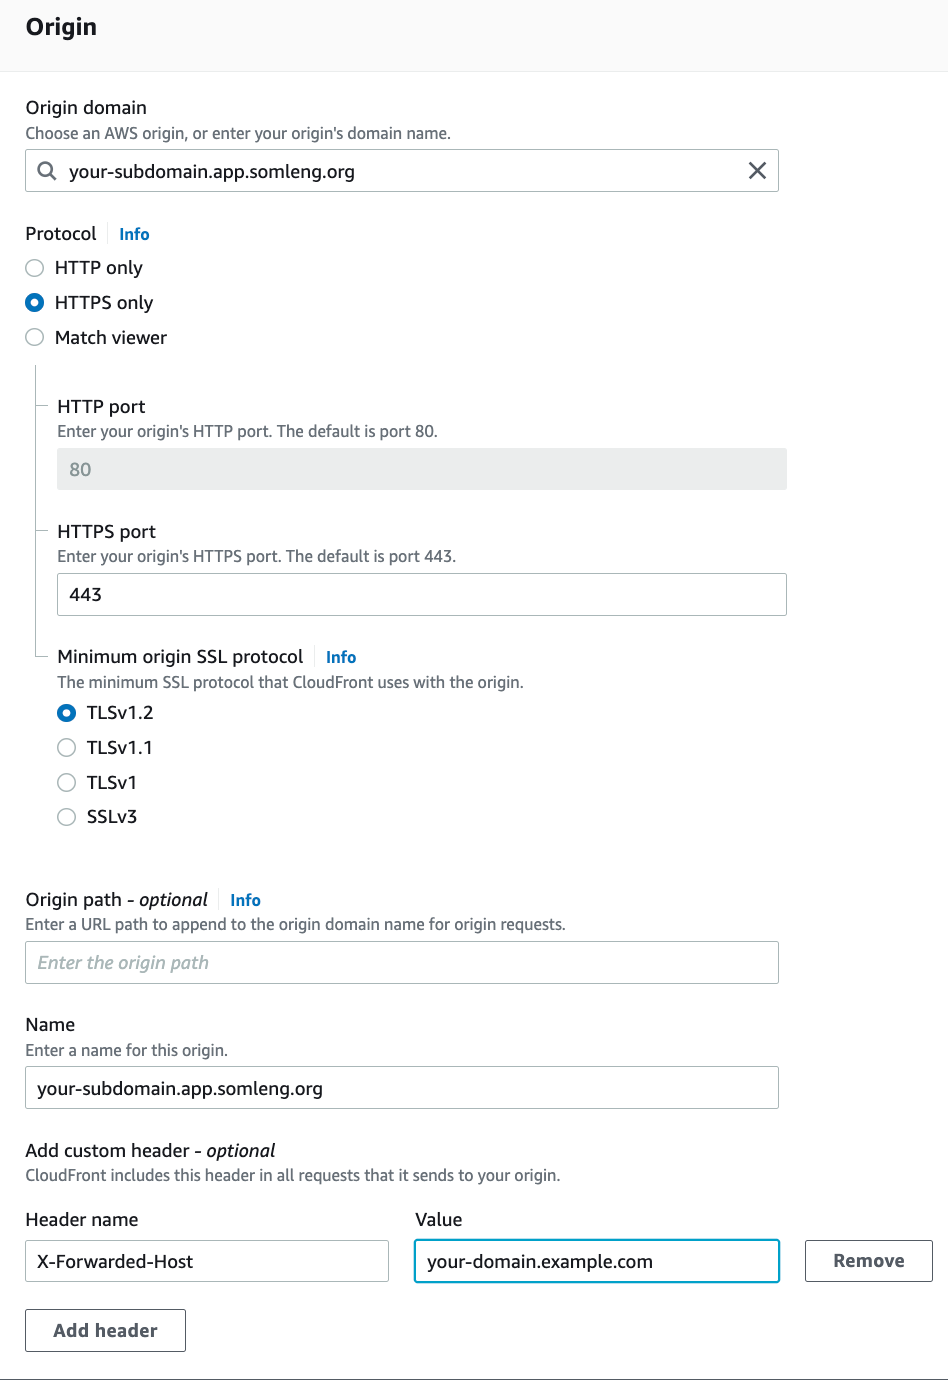
host = "your-domain.example.com" # Replace this with your custom domain
origin = "your-domain.app.somleng.org" # Replace this with your Somleng subdomain
origin_custom_headers = [
{
"name" = "X-Forwarded-Host",
"value" = "your-domain.example.com" # Replace with your custom domain
}
]
allowed_origin_request_headers = [
"X-CSRF-Token",
"X-Requested-With"
]
zone_id = aws_route53_zone.example_com.zone_id # Optional. Leave blank if not using route53.
certificate_arn = "existing-certificate-arn" # Optional. Leave blank to create a new certificate.
}
# Optionally configure a custom API endpoint
module "somleng_proxy_api" {
source = "github.com/somleng/terraform-aws-cloudfront-reverse-proxy"
host = "your-api-domain.example.com" # Replace this with your custom API domain
origin = "api.somleng.org"
# DO NOT set X-Forwarded-Host
zone_id = aws_route53_zone.example_com.zone_id # Optional. Leave blank if not using route53.
certificate_arn = "existing-certificate-arn" # Optional. Leave blank to create a new certificate.
}The terraform configuration above will configure two AWS cloudfront distributions (one for the dashboard and one for the API) and optionally create SSL certificates managed by AWS Certificate Manager. If you're using route53 to manage your domain, the module will also create records pointing your custom domain to the AWS cloudfront distributions.
Note that the second module, somleng_proxy_api is optional and only required
if you want to configure a custom API endpoint.
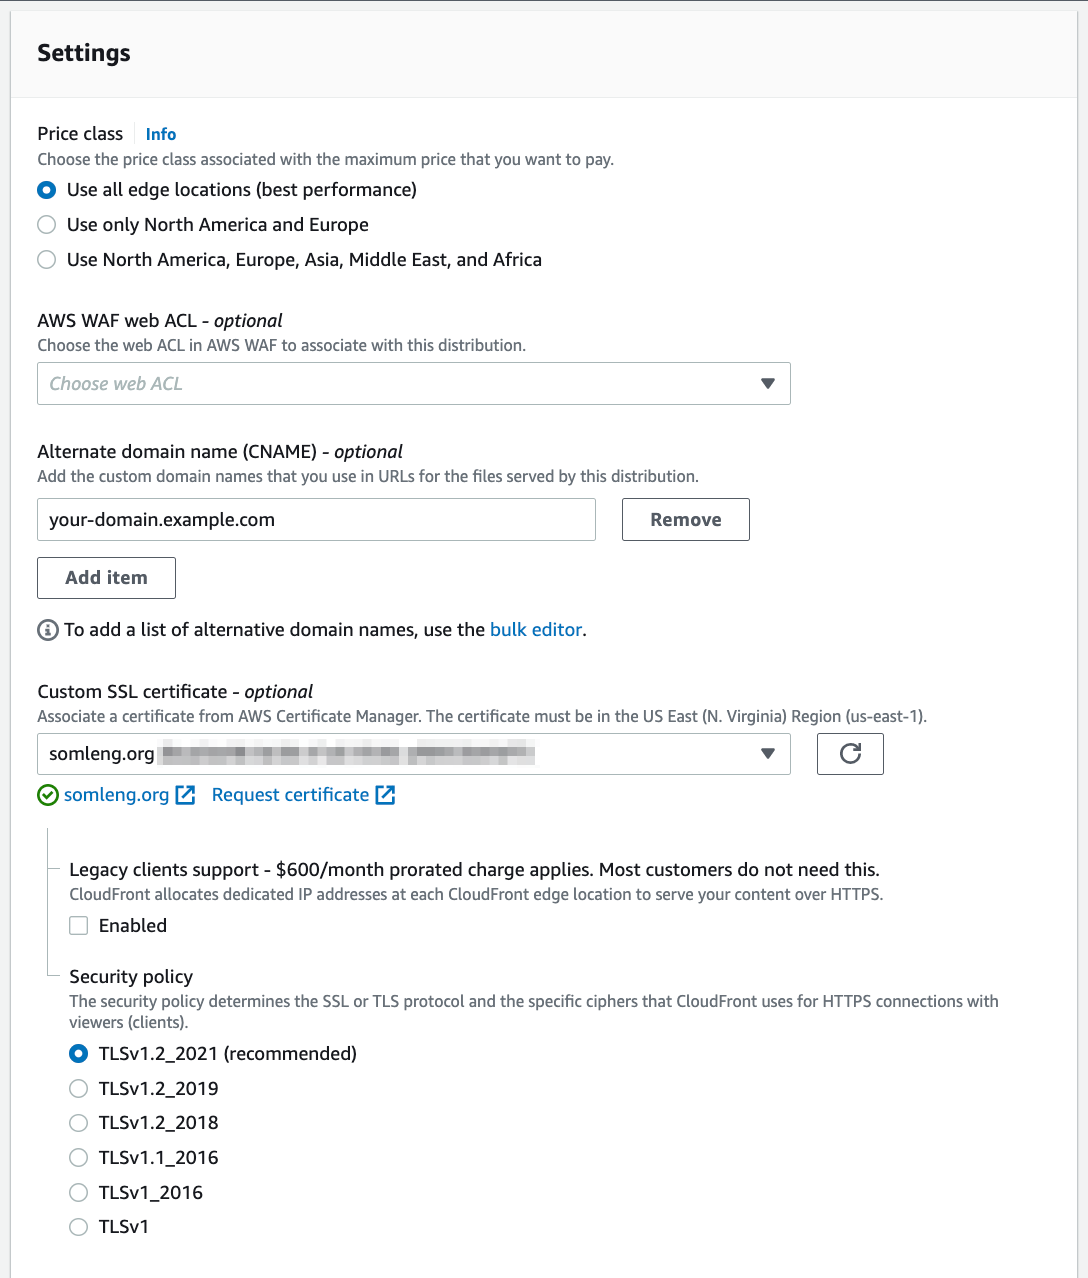
Although we highly recommend using the terraform module above, you can also configure your Cloudfront distributions from the AWS Console.
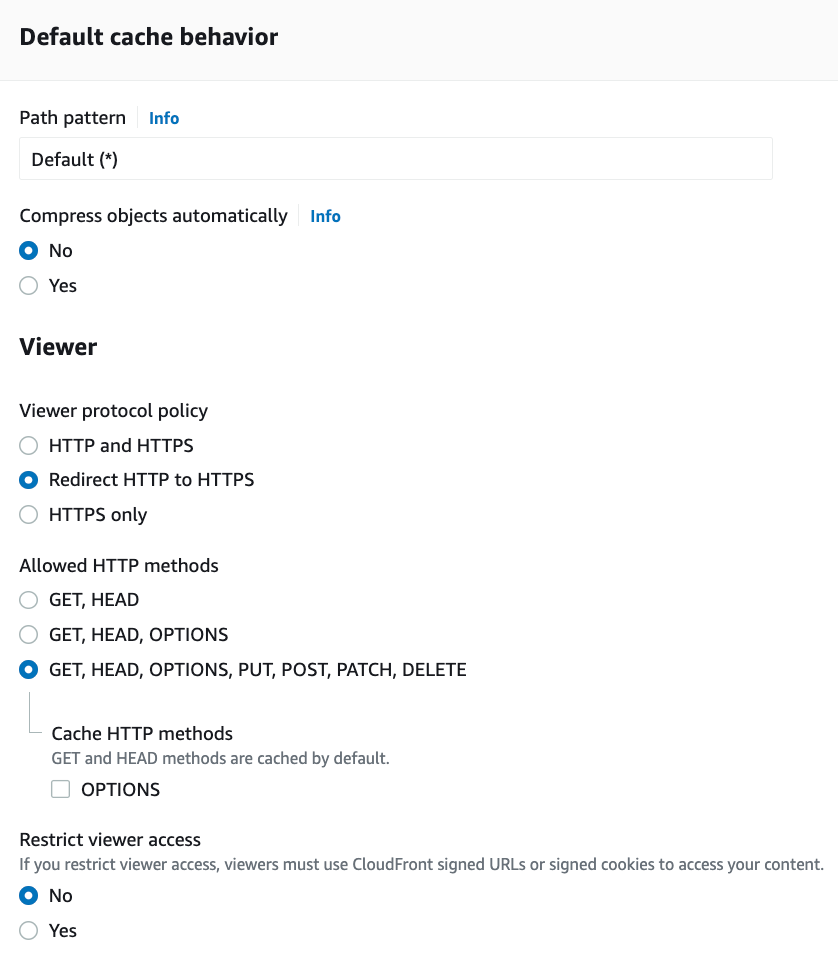
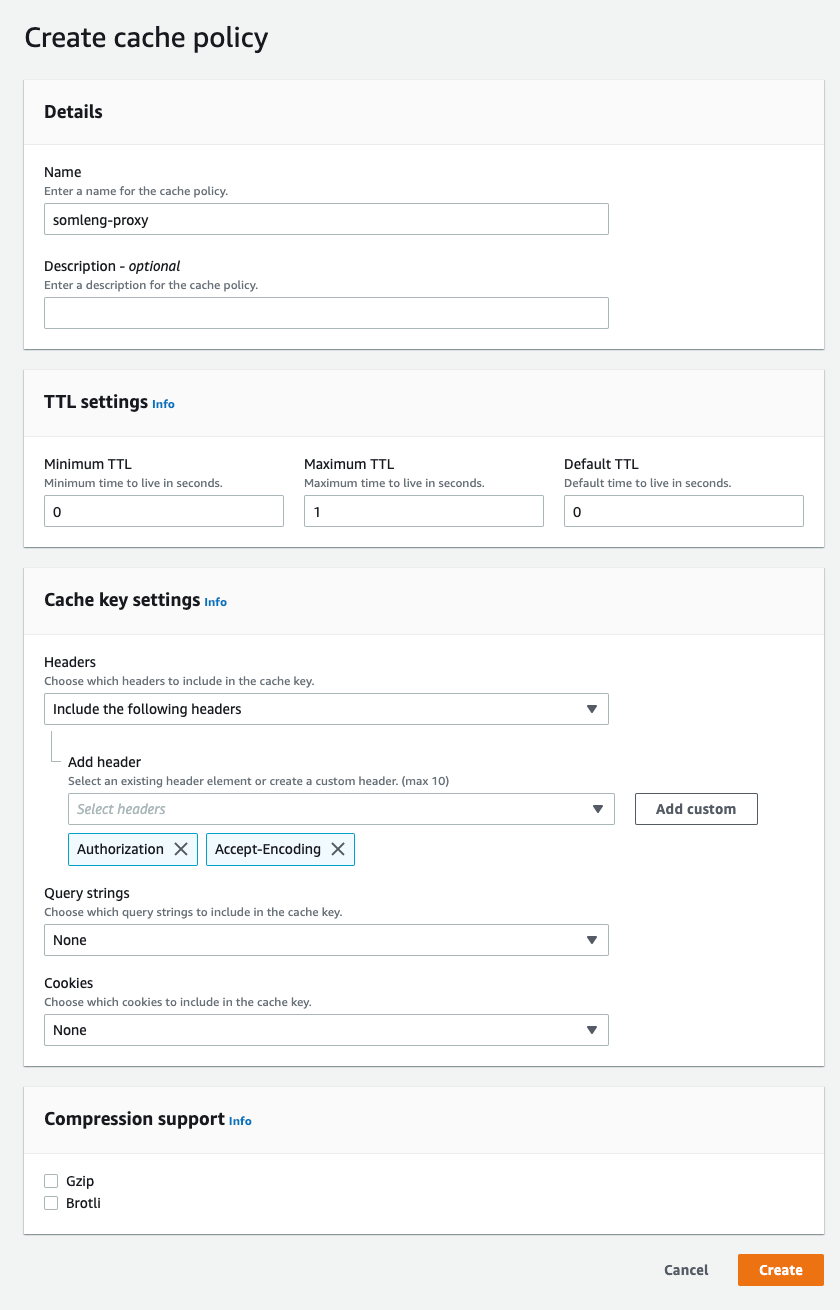
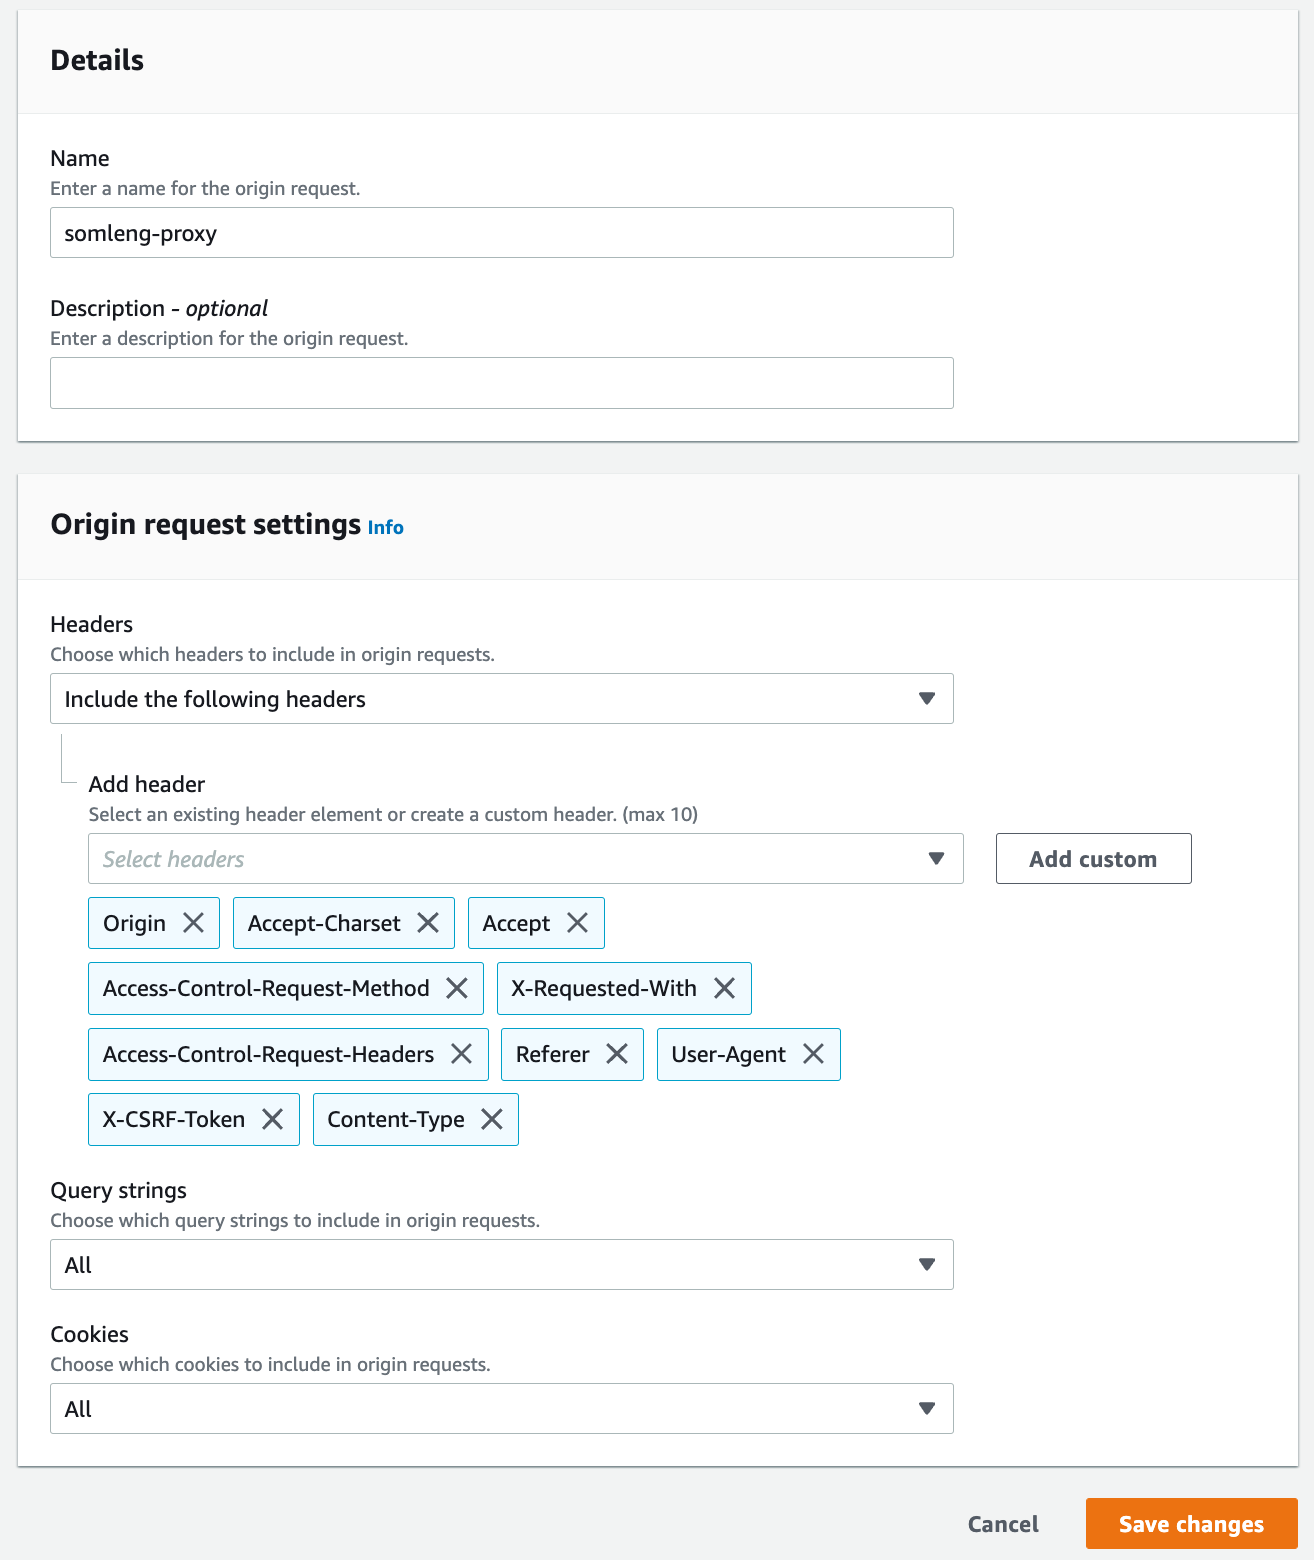
Repeat the exact same process above to create a distribution for your custom API domain, with the following modifications:

Skip this step if you prefer to use AWS Cloudfront (recommended) instead.
The following Nginx configuration can be used to setup an Nginx reverse proxy to Somleng.
  server {
    listen 443;
    server_name dashboard.example.com; # replace this with your dashboard domain

    ssl_certificate /path/to/your/fullchain.pem;
    ssl_certificate_key /path/to/your/privatekey.pem;

    location / {
      proxy_set_header X-Forwarded-Host dashboard.example.com; # replace this with your dashboard domain
      proxy_pass "https://your-subdomain.app.somleng.org:443";
    }
  }

  # Optionally configure a custom API endpoint
  # Note: DO NOT set X-Forwarded-Host for your custom API endpoint
  server {
    listen 443;
    server_name api.example.com; # replace this with your api domain

    ssl_certificate /path/to/your/fullchain.pem;
    ssl_certificate_key /path/to/your/privatekey.pem;

    location / {
      proxy_pass "https://api.somleng.org:443";
    }
  }
After you have setup your reverse proxy via AWS Cloudfront or Nginx you can test it out by going to your-domain.example.com. You should see your carrier logo and the sign in page.
Try to sign in and interact with the dashboard. Note if you get a 422 error after signing in, try clearing your browser cookies and try again.
The final step is to configure your custom domain via the Somleng Dashboard. Note that this step should only be done after you have setup and tested your reverse proxy via AWS Cloudfront or Nginx.
After configuring the custom dashboard host, customer transactional emails (such as forgot password, account invitations, etc) will link to your-domain.example.com. Carrier user transaction emails are still linked to your-subdomain.app.somleng.org.
You should also have branded API customer documentation available at your-domain.example.com/docs/api. Setting the custom API endpoint will additionally update the API documentation examples with your your-api.domain.example.com.
Note that the API is always available at api.somleng.org regardless of whether you set a custom API host or not.
SIP and RTP from Somleng is sent through a NAT Gateway. This means that the ports specified in the SDP in the SIP Invite from Somleng are unreachable which normally causes one-way audio issues. To work-around this problem, it is required that you setup Symmetric Latching on your device.
Symmetric RTP means that the IP address and port pair used by an outbound RTP flow is reused for the inbound flow. The IP address and port are learned when the initial RTP flow is received on your device. The flow's source address and port are latched onto and used as the destination for the RTP sourced by the other side of the call. The IP address and port in the c line and m line respectively in the SDP message are ignored.
If your device does not support symmetric latching we can configure your account to use a symmetric NAT. Currently this option is not configurable on the dashboard. Please contact us for assistance.